


Editorial Brows & Eyeliner
- Oct 28, 2015
- 3 min read
In this lesson with Holly, We spoke about the current trends in Mac. Holly gave us the 4 current trends and we worked around trying to achieve one of them.
The trends we discussed were :
Beautiful and downed - Disconnected eyeliner, slept in look, dark berry or black lips contrasted with pale skin.
Strength and beauty - Fresh dewy skin, flushed natural pink cheeks, little bronze on the skin, blended eye shadow (using soft colours) and nice defined brows.
Love warn - Highlighting the skin, strobing (iridescent sking), grey eyes and a romantic matte lip.
Red 70s - Burnt oranges, rusty red lips (modern twist) and grey eyes (terrecotic colours)
Holly then gave us a demo. She consentrated more on showing us how to create the perfect eye liner and also the difference in a very dramatic brow and a natural looking brow.
For the brows she used Mac's clear brush gel going in the direction of the hair, this was to set them in place before applying anything. For the dramatic brow she used Anastasia beverly hills dip brow pomade in the dark brown shade in order to give it a stronger and more defined look. She mapped out the shape underneath the brow and then filled in the rest. She still used the fade technique where it is less visible at the start of the brow. She then cleaned up the brow using concealer.
For the more natural brow, she used just an eye brow pencil and used light strokes in order to mimic the brow hairs and just fill in gaps that needed to be filled, therefore just making it more natural
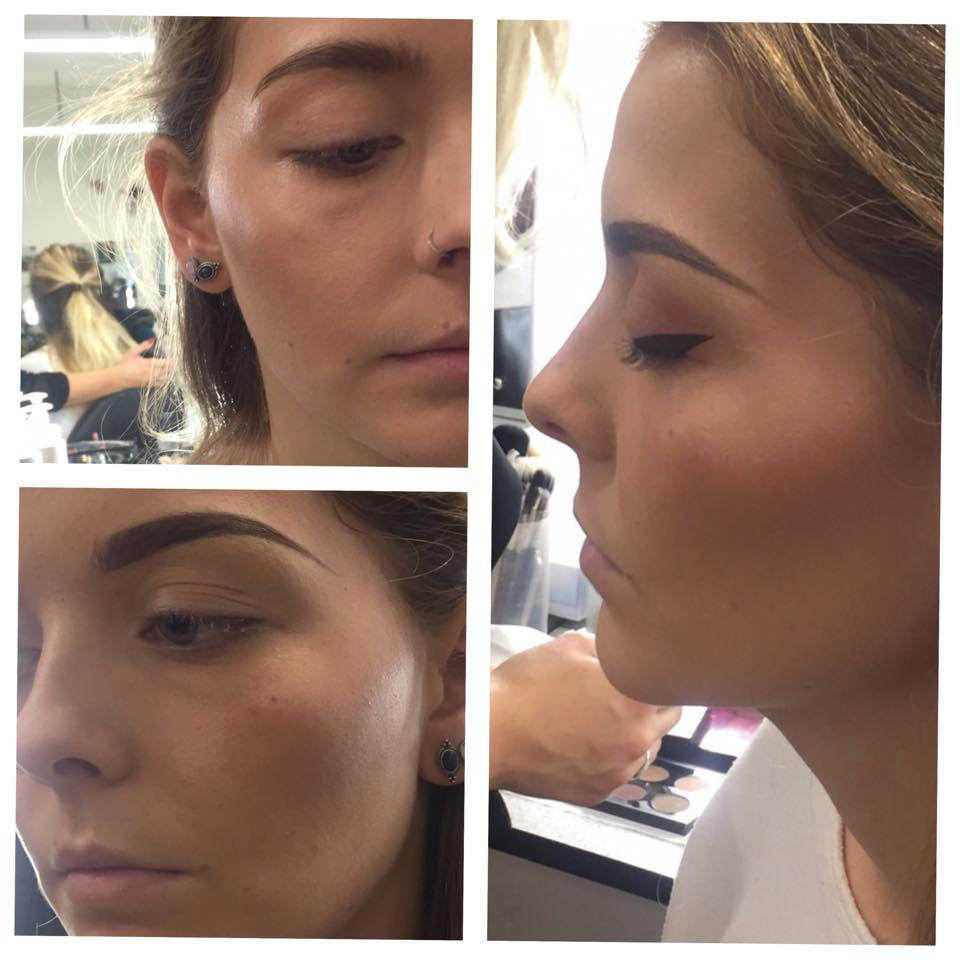
Here are some photos of the demo. You can see the difference between the brows.
Also for eye liner, She showed us how to get achieve the perfect technique. Here is a photo I found online which is more or less the technique she used.
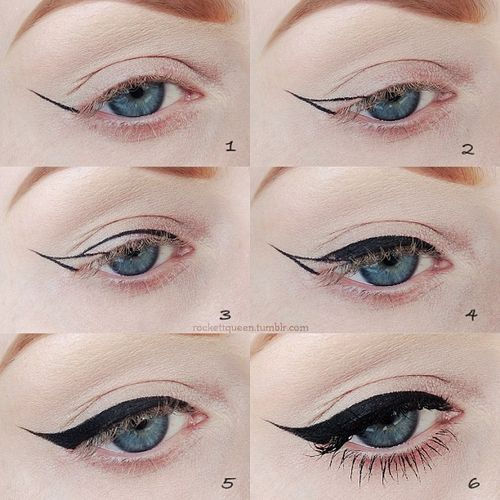
Starting off with the flick, and extending the bottom eyeline, going with the natural shape rather than starting off across and down, mapping out the flick first will help you out with making both sides even. After achieve the line, you then go back on yourself and create a straight line down, how ever far in you would like it to go. You then fill in the 'empty' space and also line until the inner corner, or how ever desired. I found this technique very helpful and here is a photo of my attempt.
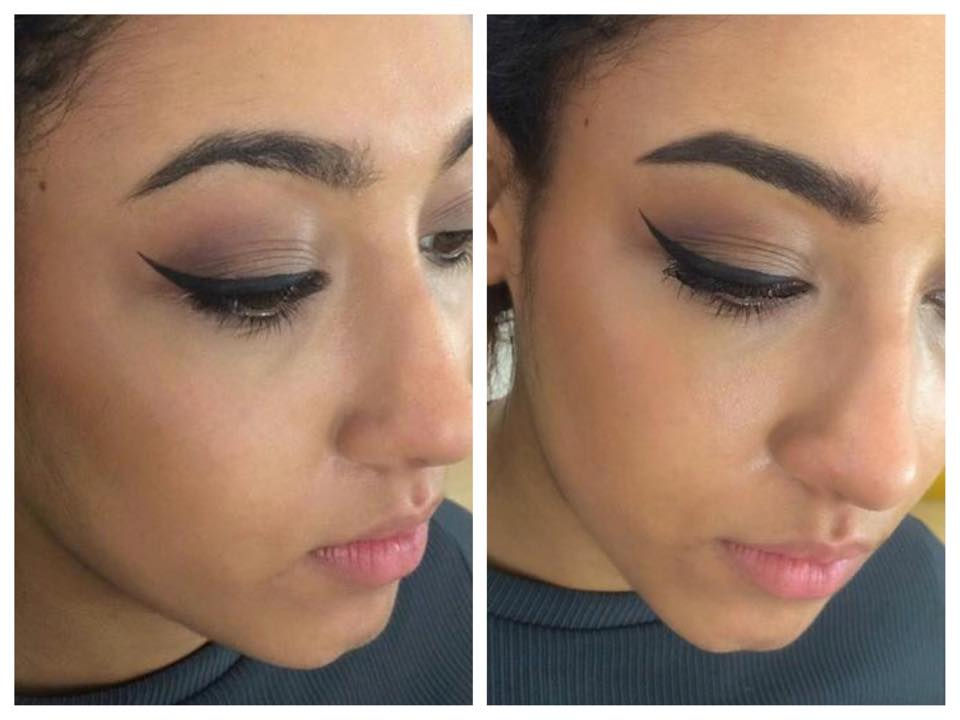
I think I managed quite easily. I created my desired shape by using the same technique that holly showed us. In the photo above you can also see the difference before and after I corrected her brows. Corrected brows makes a good difference to the overall look. I didn't overline them much, I just filled what needed to be filled in and made sure that I blended it more towards the beggining of the brow.
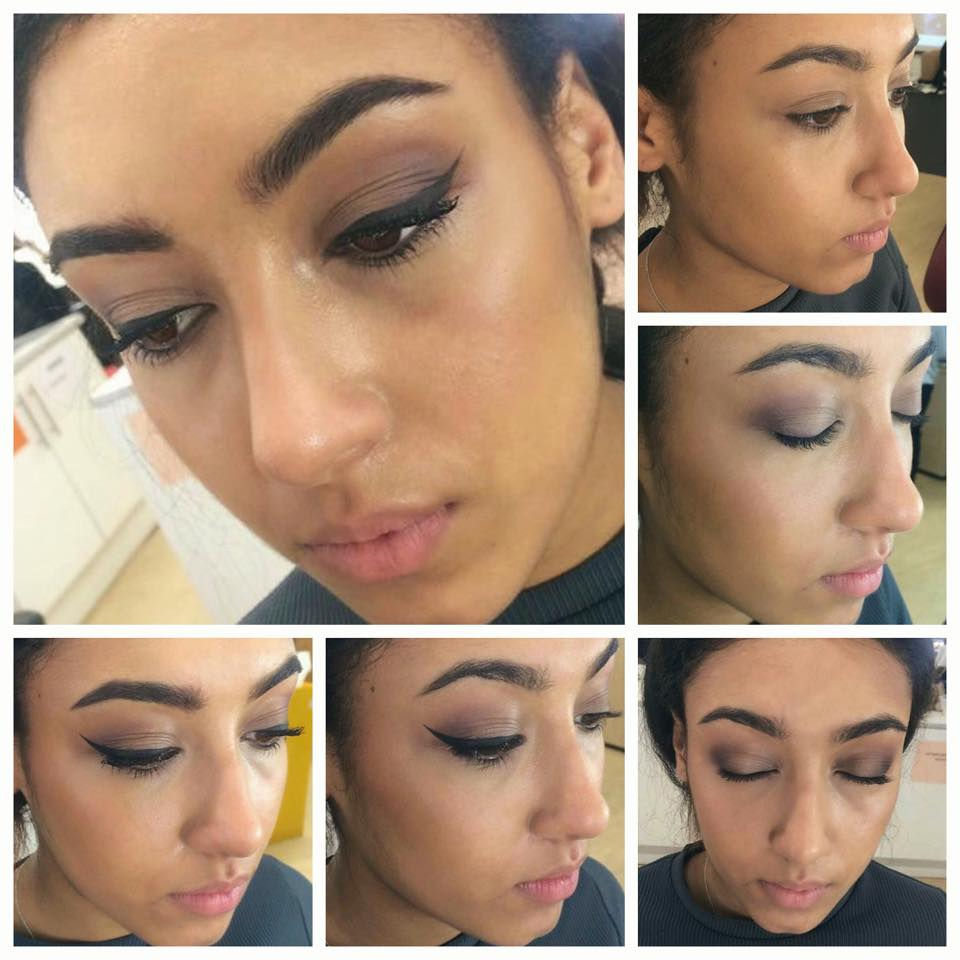
The image above shows the process of me creating this look. I forgot to take a photo of my model without make-up therefore in the first picture, I had already applied the foundation and bronzer. I went for a dewy look but not so shiny. As for eye shadow I used a natural brown and a darker purple to create some dimention in the eye socket. I would say that this look somewhat follows the Strength and beauty trend.
Sources accessed on 28.10.15
http://ilovecutemakeup.com/simple-winged-liner-tutorial/
Comments